GoodForm Grails plugin 2.0 tutorial.
1. Introduction
This tutorial covers how to setup your environment to integrate GoodForm with your Grails project. By the end of this tutorial you’ll have built a basic multi form job application controlled by business rules with basic validation. This is what we’re going to do:
-
Install One Ring rules engine
-
Install the GoodForm Plugin in a new application
-
Configure the application and Good Form
-
Create a form definition
-
Create a form controller
-
Create "Rulesets" to control the flow of your form
-
Run OneRing
-
Run your Grails project and play with your form
| For the impatient, we have created a complete application which covers the steps outlined in the tutorial. Please feel free to fork this project and start using GoodForm! |
| We assume since you’re using Grails that you have Java installed. One Ring likes Java 7, so that would be a good choice. |
2. Install One Ring
GoodForm needs a One Ring rules engine service to run. One Ring runs Rulesets that look at the information entered on your form, and any ancillary information provided, to determine what questions to ask next. In other words the Rules in the Rulesets determine the flow of your form.
| One Ring is a general purpose rules engine service and can be used by multiple applications. It also scales out as all the rules are in memory and can be synchronously updated while running. So if you stand up One Ring for your forms consider using it for other parts of your application, or other applications. |
Check the One Ring install documentation at http://nerderg.com/One+Ring+install for changes to the install instructions and other options.
We will install the stand alone One Ring install for this tutorial.
-
download one-ring-1.0.1-tomcat-7.0.22.zip and unzip it somewhere
-
Make sure java is in your path and run
apache-tomcat-7.0.22/bin/startup.sh -
Point your browser at
http://localhost:8080/rulesEngineand you see the One Ring web interface after a short wait
If you are installing on Windows you need to create a c:\tmp directory (or d:\tmp). The complete set of RuleSets
are copied into rules.groovy in \tmp to assist with debugging.
|
Because we’re going to be building a Grails app, the One Ring port will clash with the default Grails (Tomcat) port, so we’ll change it to 7070:
-
Edit the One Ring
apache-tomcat-7.0.22/conf/server.xmlfile and change the connector port from8080to7070
...
<Connector executor="tomcatThreadPool"
               port="8080" protocol="HTTP/1.1"
               connectionTimeout="20000"
               redirectPort="8443" />
......
<Connector executor="tomcatThreadPool"
port="7070" protocol="HTTP/1.1"
connectionTimeout="20000"
redirectPort="8443" />
...Then restart tomcat by running apache-tomcat-7.0.22/bin/shutdown.sh followed by apache-tomcat-7.0.22/bin/startup.sh.
| On some hardware it may take a little while for tomcat to shutdown completely. It is a good idea to check that Java has exited before restarting tomcat. |
OK you now have One Ring installed!
3. Install the GoodForm Plugin
GoodForm being a Grails Plugin requires a Grails project to run, which requires Grails installed, which requires Java. We’ll just go ahead and assume you have Grails installed. In fact we’re going to use Grails 2.4.3 as our tutorial example, so if you don’t have that installed, now might be a good time to do it.
| If you don’t use GVM to install and control your Groovy Grails environment and installs yet, do yourself a favour, and pop over to http://gvmtool.net/ and have a look. |
Lets create an app using Grails 2.4.3:
> gvm use grails 2.4.3
> grails create-app goodform-tutorial
> | Created Grails Application at /home/pmcneil/devel/nerderg/grails-plugins/goodform-tutorial
Now we need to add GoodForm as a dependency so edit your grails-app/conf/BuildConfig.groovy and add
compile ":goodform:2.0.0" to the plugins section. While you’re there lets add the simple suggestion plugin too, so add
compile ":simple-suggestions:0.2" to the plugin section as well. Your BuildConfig.groovy plugins section should look
something like this:
plugins {
        // plugins for the build system only
        build ":tomcat:7.0.55"

        // plugins for the compile step
        compile ":scaffolding:2.1.2"
        compile ':cache:1.1.7'
        compile ":asset-pipeline:1.9.6"
        compile ":goodform:2.0.0"
        compile ":simple-suggestions:0.2"

        // plugins needed at runtime but not for compilation
        runtime ":hibernate4:4.3.5.5" // or ":hibernate:3.6.10.17"
        runtime ":database-migration:1.4.0"
        ...
}
4. Configure Good Form and its resources
Good Form needs to know where the rules engine is, so lets add that to the end of your grails-app/conf/Config.groovy
file.
...
//GoodForm config
goodform {
    rulesEngine.uri = 'http://localhost:7070/rulesEngine'
}
While we’re in the Config.groovy file we might just set logging to debug by adding debug 'grails.app' to the end of
the log4j.main = {...} closure.
Good Form adds some resources to make the forms work and look nice, so set them up. Since we’re using Grails 2.4.3 we’ll
use the asset-pipeline and add the resources to the grails-app/assets/javascript/applications.js and
grails-app/assets/stylesheets/applications.css files.
| If you’re using an older version of Grails and the Resources plugin check out Using the resources plugin |
applications.js should look like this
 // This is a manifest file that'll be compiled into application.js.
 //
 // Any JavaScript file within this directory can be referenced here using a relative path.
 //
 // You're free to add application-wide JavaScript to this file, but it's generally better
 // to create separate JavaScript files as needed.
 //
 // *Good Form resources*
 //= require jquery
 //= require js/jquery-ui-1.10.4.custom
 //= require goodform
 //
 //= require_tree .
 //= require_self

 if (typeof jQuery !== 'undefined') {
 	(function($) {
 		$('#spinner').ajaxStart(function() {
 			$(this).fadeIn();
 		}).ajaxStop(function() {
 			$(this).fadeOut();
 		});
 	})(jQuery);
 }
Good Form added the jquery and jquery ui plugins as dependencies so we need those to be loaded along with the goodform.js file.
application.css should look like this.
/*
* This is a manifest file that'll be compiled into application.css, which will include all the files
* listed below.
*
* Any CSS file within this directory can be referenced here using a relative path.
*
* You're free to add application-wide styles to this file and they'll appear at the top of the
* compiled file, but it's generally better to create a new file per style scope.
*
*= require themes/ui-lightness/jquery-ui-1.10.4.custom.css
*= require goodform
*= require_self
*/| Notice that we have removed the default main.css because we are going to use Bootstrap. |
Now we’re going to add Bootstrap and Font Awesome.
To do this we’re just going to use the Content Delivery Network (CDN) by modifying the grails-app/views/layouts/main.gsp.
| Using the CDN means you need to be connected to the interwebs to get the files. |
We also need to add a <div> with the class container to make bootstrap work nicely. Your main.gsp should look like this:
<!DOCTYPE html>
<!--[if lt IE 7 ]> <html lang="en" class="no-js ie6"> <![endif]-->
<!--[if IE 7 ]> <html lang="en" class="no-js ie7"> <![endif]-->
<!--[if IE 8 ]> <html lang="en" class="no-js ie8"> <![endif]-->
<!--[if IE 9 ]> <html lang="en" class="no-js ie9"> <![endif]-->
<!--[if (gt IE 9)|!(IE)]><!--> <html lang="en" class="no-js"><!--<![endif]-->
<head>
<meta http-equiv="Content-Type" content="text/html; charset=UTF-8">
<meta http-equiv="X-UA-Compatible" content="IE=edge,chrome=1">
<title><g:layoutTitle default="Grails"/></title>
<meta name="viewport" content="width=device-width, initial-scale=1.0">
<link rel="shortcut icon" href="${assetPath(src: 'favicon.ico')}" type="image/x-icon">
<link rel="apple-touch-icon" href="${assetPath(src: 'apple-touch-icon.png')}">
<link rel="apple-touch-icon" sizes="114x114" href="${assetPath(src: 'apple-touch-icon-retina.png')}">
%{-- include the hosted javascript and styles --}%
<asset:stylesheet src="application.css"/>
<asset:javascript src="application.js"/>
%{-- include bootstrap from the CDN --}%
<link rel="stylesheet" href="https://maxcdn.bootstrapcdn.com/bootstrap/3.2.0/css/bootstrap.min.css">
<link rel="stylesheet" href="https://maxcdn.bootstrapcdn.com/bootstrap/3.2.0/css/bootstrap-theme.min.css">
<script src="https://maxcdn.bootstrapcdn.com/bootstrap/3.2.0/js/bootstrap.min.js"></script>
%{-- include font-awesome --}%
<link href="//maxcdn.bootstrapcdn.com/font-awesome/4.2.0/css/font-awesome.min.css" rel="stylesheet">
<g:layoutHead/>
</head>
<body>
%{-- add the container class div around the content for bootstrap goodness --}%
<div class="container">
<div id="grailsLogo" role="banner"><a href="http://grails.org"><asset:image src="grails_logo.png" alt="Grails"/></a>
</div>
<g:layoutBody/>
<div class="footer" role="contentinfo"></div>
<div id="spinner" class="spinner" style="display:none;"><g:message code="spinner.alt"
default="Loading…"/></div>
</div>
</body>
</html>OK, that’s it for configuration, lets make a form!
5. Create a form definition
A form definition is a Good Form DSL that describe the questions you want ask your user. In this tutorial we want to make a job application form. At this point we don’t need to worry about what question will be asked when, we just need to write down all the questions that we need answers to. In your own application you may have an existing paper based form which you could use as a starting point, but we’re just going to make some stuff up :-)
The form DSL is stored as a String (sqlType: text) in the database, so we need to provide the definition as a string and
add it. There are many ways you can get the definition in but we’re just going to define it directly in the
grails-app/conf/BootStrap.groovy file, and add it at start-up.
The form definition DSL is valid groovy code, so you can edit it in a file with a .groovy extension in your IDE
and make use of it’s highlighting and error detection.
|
| Good Form provides a very basic administrative interface to edit and add new form versions. This is only meant for development use, so make sure you prevent users from accessing it in production. The admin interface is in the FormAdminController and you can access it at http://localhost:8080/goodform-tutorial/formAdmin/index when the application is running. |
Lets define some questions. Our form definition looks like this:
form {

    question("Name") {
        "What is your name?" group: "names", {
            "Title" text: 10, hint: "e.g. Mr, Mrs, Ms, Miss, Dr", suggest: "title", map: "Title"
            "Given Names" text: 50, required: true, map: "givenNames"
            "Last or Family Name" text: 50, required: true, map: "lastName"
            "Have you been or are you known by any other names?" hint: "e.g. maiden name, previous married name, alias, name at birth", map: "hasAlias", {
                "List your other names" listOf: "aliases", {
                    "Other name" text: 50, map: 'alias'
                    "Type of name" text: 40, hint: "e.g maiden name", suggest: "nameType", map: 'aliasType'
                }
            }
        }
    }
    question("Contact") {
        "Contact details" group: "contact", {
            "Home address" text: 200, map: 'homeAddress'
            "Postcode" number: 4, hint: "e.g. 2913", map: 'postcode'
            "Home Phone" phone: 15, map: 'homePhone'
            "Mobile Phone" phone: 15, map: 'mobilePhone'
            "Work Phone" phone: 15, map: 'workPhone'
        }
    }
    question("Education") {
        "Education" group: "education", {
            "University" listOf: "universities", {
                "Name" text: 80, map: 'name'
                "Number of Years attended" number: 0..10, units: 'years', map: 'years'
                "Date completed" date: 'd/M/yyyy', map: 'dateComplete'
                "Degree" text: 80, map: 'degree'
                "Course" text: 80, map: 'course'
            }
            "High School" listOf: "highSchools", {
                "Name" text: 80, map: 'name'
                "Date completed" date: 'd/M/yyyy', map: 'dateComplete'
            }
        }
    }

    question("Role") {
        "Enter the details of the role you are applying for" group: "role", {
            "Job Reference" text: 80, required: true, map: 'jobNumber'
            "Position" text: 80, required: true, map: 'position'
            "Company" text: 80, required: true, map: 'company'
        }
    }

    question("Resume") {
        "Resume" group: "resume", {
            "Attach a copy of your resume" attachment: "resume_file", map: 'resume'
        }
    }

    question("Referees") {
        "Enter details for two referees" group: "references", {
            "Referee" listOf: "referee", {
                "Given Names" text: 80, required: true, map: 'givenNames'
                "Last or Family Name" text: 50, required: true, map: 'lastName'
                "Contact Phone" phone: 15, required: true, map: 'phone'
            }

        }
    }
}
A common error in writing form definitions is forgetting the comma before the opening { of group or list etc.
|
We’re going to add it to the Bootstrap.groovy file. I’ve remove the guts of the DSL for clarity (and because the syntax
highlighter gets confused by multi-line strings) :
import com.nerderg.goodForm.FormDefinition

class BootStrap {

    def formDataService

    def init = { servletContext ->

        String jobApplicationDefinition = """
form {
    ... * rest of DSL goes here *
}
"""
        //check if the JobApplication form definition already exists before adding it.
        if (!FormDefinition.findByName('JobApplication')) {
            formDataService.createNewFormVersion('JobApplication', jobApplicationDefinition)
        }

    }

    def destroy = {
    }
}
Here we are checking to see if the JobApplication form definition already exists before adding it using
if (!FormDefinition.findByName('JobApplication')), and we create a new one using the formDataService,
formDataService.createNewFormVersion('JobApplication', jobApplicationDefinition).
6. Create a form controller
The form controller is the way you integrate the form with your application. Good Form does most of the hard work for you,
you simply extend the Form controller and override createform() to provide the form name and if you want to provide initial
data like user name or account details etc. override getRuleFacts(). You will also want to override the submit()
action to handle the completed form and perhaps process the data.
Lets create the JobApplicationFormController:
grails create-controller com.nerderg.goodform.tutorial.JobApplicationFormController
Your form controller must end in Form or the URL mapping for back and view actions won’t work. If you
don’t want to call your controller blahFormController you will need to provide your own URL mapping.
|
Now we need to override the create form and perhaps supply some data for the form, so modify the controller to look like this:
package com.nerderg.goodform.tutorial

import com.nerderg.goodForm.FormController

class JobApplicationFormController extends FormController {

    protected static final String formName = 'JobApplication'

    def createForm() {
        createForm(formName)
    }

    protected Map getRuleFacts() {
        // pre-fill the users name from data we know...
        [Name: [names: [givenNames: 'Peter', lastName: 'McNeil']]]
    }
}
Note how we are pre filling some information that we already know, the users name. Now all we need are some rules and we can run it up!
7. Create Rulesets to control the flow of your form
Rulesets are used to control the flow of your form and to validate the data entered. Rules can skip questions, go back to previous questions, and even pre-fill information. Rules have access to all the form data in the fact Map, so you can do pretty much anything with the data via rules. If you use the reference service, the reference data will also be in the form data map which is the fact Map.
7.1. The first rule, and questions
Create a new file in your OneRing rules directory ($HOME/.OneRing/rules/) called JobApplication.ruleset. First we need
a rule to tell Good Form what question to start with. In our case we’ll ask the same first questions every time, Name
and Contact.
Our first Ruleset could look like this:
ruleset("JobApplication") {

    rule("First page of questions") {
        when {
            true
        }
        then {
            next = ['Name', 'Contact']
        }
    }

}
When starting a new form, Good Form will ask for the Ruleset that has the same name as the form, in our case "JobApplication".
We need only one rule in our JobApplication Ruleset, which we have called "First page of questions". We always want it to return the same thing so we’ve made the when clause always true.
In the then clause we set the fact next to the list of questions we want asked next = ['Name', 'Contact']].
The above rule is using the simple logic DSL in OneRing, but since we’re just returning the next questions to ask we
could simplify this by just assigning the next fact like this:
    rule("First page of questions") {
            fact.next = ['Name', 'Contact']
    }
This style makes more sense when you don’t have any logic to perform.
Note how we have to specify fact. when not within a when, then, otherwise clause to refer to a fact.
|
7.2. Next, …
When the user has filled in the Name and Contact questions and hits the Next button Good Form will again submit the Form Data to the Rules Engine to decide what next to ask the user. Good Form uses the last question asked along with the form name to work out which Ruleset to ask. Since the last question was "Contact" the Ruleset called will be "JobApplicationContact".
We’re going to make this Ruleset a little more interesting by sending the user a message, checking the aliases are not silly and that the home phone number has the correct area code, "02". This is what it looks like:
ruleset("JobApplicationContact") {

    require(['Name', 'Contact'])  //we need the answers to these questions

    rule("Check name") {
        int sillyAlias = -1
        when {
            if (Name.names.hasAlias.yes) {
                sillyAlias = Name.names.hasAlias.aliases.aliasType.indexOf('silly')
            }
            sillyAlias == -1
        }
        then {
            messages << "Hello $Name.names.givenNames"
        }
        otherwise {
            fieldErrors["Name.names.hasAlias.aliases.aliasType$sillyAlias"] = "This is a silly alias."
            errors = true
        }
    }

    rule("Check contact details") {
        when {
            Contact.contact.homePhone.trim() == '' ||
                    Contact.contact.homePhone.startsWith('02')
        }
        otherwise {
            fieldErrors['Contact.contact.homePhone0'] = "Home phone must start with 02"
            errors = true
        }
    }

    rule("check errors") {
        if (fact.errors) {
            fact.next = ['Name', 'Contact']
        } else {
            fact.next = ['Education']
        }
        fact.remove('errors')
    }
}
This Ruleset contains three rules, and we’re using the logic DSL. At the top we have a require clause that
tells OneRing that the fact map must contain the keys Name and Contact which tell us the questions have been answered.
The first rule, "Check name", checks the name aliases for any aliasType that are literally "silly" and sets an error
message for the field to say "This is a silly alias." If there are no "silly" aliases it adds a greeting message for the
user using the givenNames they filled in. We’ll look closer at the fieldErrors below.
The second rule, "Check contact details", checks if the homePhone is blank or starts with "02", otherwise we set a
fieldError saying "Home phone must start with 02". Note we trim() the field in case the user accidentally enters a space.
The third rule, "check errors", checks if an error has been flagged and sets the next questions back to Contact and Name for the user to correct the errors. If no errors, the next question to be asked is "Education".
|
In the above ruleset we set a key called "errors" in the fact map. This value is persisted to the Form Data if not removed. This can cause unexpected results as it will be in the fact map next time this or another rule is called. So why not use a global variable in the Ruleset instead? Because there is only one instance of a Ruleset and that variable is shared by all the concurrently running rule closures, and that will be bad. The Fact map belongs to the scope of the running rules, so that is OK. It’s a good idea to namespace your rule variables on the fact map so you don’t clobber other data. |
I hope that little Ruleset gives you a feel for how you can break complex rules into bite sized blocks. With any luck the next person, or even your boss might understand it. At least all your business logic is in one place.
I’ll leave you to figure out the next Ruleset, "JobApplicationEducation"
ruleset("JobApplicationEducation") {

    require(['Education'])  //we need the answers to these questions

    rule("Check education") {
        fact.next = ['Role', 'Resume', 'Referees']
    }

}
7.3. The End
At some point you will run out of questions to ask the user. When you do, return next = ['End'] from your rule. Here
is the final validation/next Ruleset called "JobApplicationReferees".
| End is case sensitive. |
ruleset("JobApplicationReferees") {

    require(['Role', 'Resume', 'Referees'])  //we need the answers to these questions

    rule("Check role resume and referees") {
        fact.next = ['End']
    }

}
As you can see it just returns next = ['End']. At this point Good Form will ask the rules engine to check the form for
completeness. For this is calls the Ruleset called formName + "CheckRequiredDocuments", which will be
"JobApplicationCheckRequiredDocuments" in this case.
| The idea of calling the CheckRequiredDocuments Ruleset is that complex forms may take several goes to complete, and it can be much easier for the person entering information to fill in as much of the document as possible without being stopped to fill in required fields. CheckRequiredDocuments lets you put off enforcing those requirements to just before they submit the form. As the name suggests this idea particularly applies to supplying attached documents to the form. |
We’ve only got one requirement here, that the user supply a resume. The following rule checks that the resume is attached
and if not adds a require item including the question and a message. Good Form will say something like "the form is
not complete" followed by the list of requirements with links to the questions for people to fill in.
This page is very useful as you can print or email for the user as a list of things they still need to supply.
ruleset("JobApplicationCheckRequiredDocuments") {

    require(['Resume'])  //we need the answers to these questions

    rule('prep') {
        fact.require = []  //create the set 'require'
        println "\n\nResume looks like this $fact.Resume\n"
    }

    rule('Need resume') {
        when {
            Resume.resume.resume.resume_file == 'none'
        }
        then {
            require.add([Q: 'Resume', message: 'You still need to provide your resume.'])
        }
    }
}
The "prep" rule clears the require list, the "Need resume" rule checks the resume attachment has a file name, and if not
adds a Map containing the question and a message for the user.
7.4. The whole thing
Putting all that together your $HOME/.OneRing/rules/jobApplication.ruleset file should look like this:
ruleset("JobApplication") {

    rule("First page of questions") {
        fact.next = ['Name', 'Contact']
    }

}

ruleset("JobApplicationContact") {

    require(['Name', 'Contact'])  //we need the answers to these questions

    rule("Check name") {
        int sillyAlias = -1
        when {
            if (Name.names.hasAlias.yes) {
                sillyAlias = Name.names.hasAlias.aliases.aliasType.indexOf('silly')
            }
            sillyAlias == -1
        }
        then {
            messages << "Hello $Name.names.givenNames"
        }
        otherwise {
            fieldErrors["Name.names.hasAlias.aliases.aliasType$sillyAlias"] = "This is a silly alias."
            errors = true
        }
    }

    rule("Check contact details") {
        when {
            Contact.contact.homePhone.trim() == '' ||
                    Contact.contact.homePhone.startsWith('02')
        }
        otherwise {
            fieldErrors['Contact.contact.homePhone0'] = "Home phone must start with 02"
            errors = true
        }
    }

    rule("check errors") {
        if (fact.errors) {
            fact.next = ['Name', 'Contact']
        } else {
            fact.next = ['Education']
        }
        fact.remove('errors')
    }
}

ruleset("JobApplicationEducation") {

    require(['Education'])  //we need the answers to these questions

    rule("Check education") {
        fact.next = ['Role', 'Resume', 'Referees']
    }

}

ruleset("JobApplicationReferees") {

    require(['Role', 'Resume', 'Referees'])  //we need the answers to these questions

    rule("Check role resume and referees") {
        fact.next = ['End']
    }

}

ruleset("JobApplicationCheckRequiredDocuments") {

    require(['Resume'])  //we need the answers to these questions

    rule('prep') {
        fact.require = []  //create the set 'require'
        println "\n\nResume looks like this $fact.Resume\n"
    }

    rule('Need resume') {
        when {
            Resume.resume.resume.resume_file == 'none'
        }
        then {
            require.add([Q: 'Resume', message: 'You still need to provide your resume.'])
        }
    }
}
8. Run OneRing
Now we have a Ruleset we’ll start up OneRing. Go to your OneRing installation and start it up using apache-tomcat-7.0.22/bin/startup.sh.
If it’s already running just go to http://localhost:7070/rulesEngine/ruleSet/list in your web browser and click the Update button to load your new jobApplication rules. You should see the Rulesets listed there.
9. Run your app and play with your form
OK now we can try out the form and see what it’s like! Run your grails app in the usual way, grails run-app, and open
your web browser at http://localhost:8080/goodform-tutorial/. You should see your com.nerderg.goodform.tutorial.JobApplicationFormController
listed on the index page, click it, then click on New form after a couple of seconds you should see the first questions
displayed. You should also see some logging, since we set it to debug, that looks something like this:
2014-10-09 22:32:36,459 ... DEBUG goodForm.FormController  - apply: [action:createForm, format:null, controller:jobApplicationForm] getFromQuestions took 334 ms
2014-10-09 22:32:36,811 ... DEBUG goodForm.RulesEngineService  - [Name:[...]]
2014-10-09 22:32:36,812 ... DEBUG goodForm.RulesEngineService  - ask json http://localhost:7070/rulesEngine/rest/applyRules JobApplication
2014-10-09 22:32:37,137 ... DEBUG goodForm.FormController  - continue: [id:1, action:continueForm, format:null, controller:jobApplicationForm]
2014-10-09 22:32:38,095 ... DEBUG goodForm.GoodFormService  - *** geting model for group
2014-10-09 22:32:38,442 ... DEBUG goodForm.GoodFormService  - *** geting model for text
2014-10-09 22:32:39,582 ... DEBUG goodForm.GoodFormService  - *** geting model for text
2014-10-09 22:32:39,616 ... DEBUG goodForm.GoodFormService  - *** geting model for text
2014-10-09 22:32:39,623 ... DEBUG goodForm.GoodFormService  - *** geting model for bool
2014-10-09 22:32:39,961 ... DEBUG goodForm.GoodFormService  - *** geting model for listOf
2014-10-09 22:32:40,373 ... DEBUG goodForm.GoodFormService  - *** geting model for text
2014-10-09 22:32:40,379 ... DEBUG goodForm.GoodFormService  - *** geting model for text
2014-10-09 22:32:41,090 ... DEBUG goodForm.GoodFormService  - *** geting model for group
2014-10-09 22:32:41,093 ... DEBUG goodForm.GoodFormService  - *** geting model for text
2014-10-09 22:32:41,378 ... DEBUG goodForm.GoodFormService  - *** geting model for number
2014-10-09 22:32:41,564 ... DEBUG goodForm.GoodFormService  - *** geting model for phone
2014-10-09 22:32:41,778 ... DEBUG goodForm.GoodFormService  - *** geting model for phone
2014-10-09 22:32:41,783 ... DEBUG goodForm.GoodFormService  - *** geting model for phone
And you should see a form page that looks like the picture below.
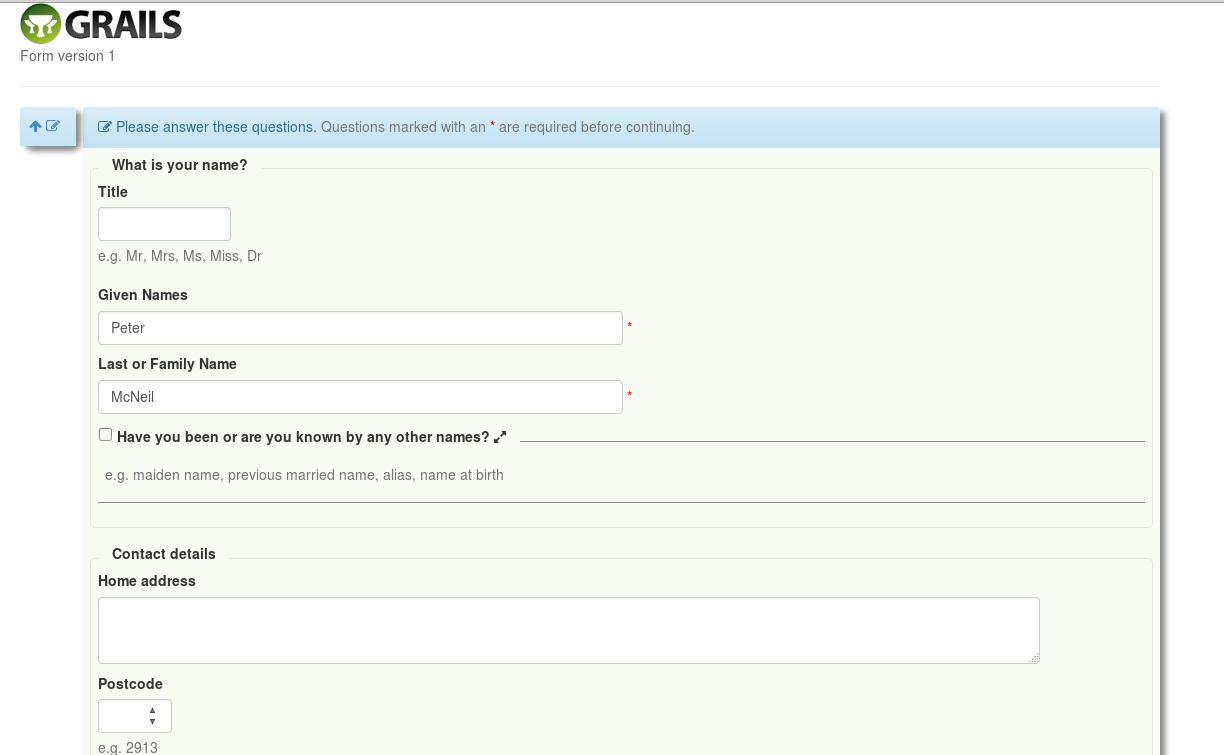
Go ahead and have a little play, fill in some values and then hit the Next button. You should be taken to the next set of questions and be greeted with a "Hello Peter" or whatever first name you entered. This page should look like the picture below.
| The Index buttons scroll to the various pages of answers that you have filled in. You can always see what you have filled in without reloading the page or losing your place. Clicking on a previous panel lets you edit that set of questions again. |

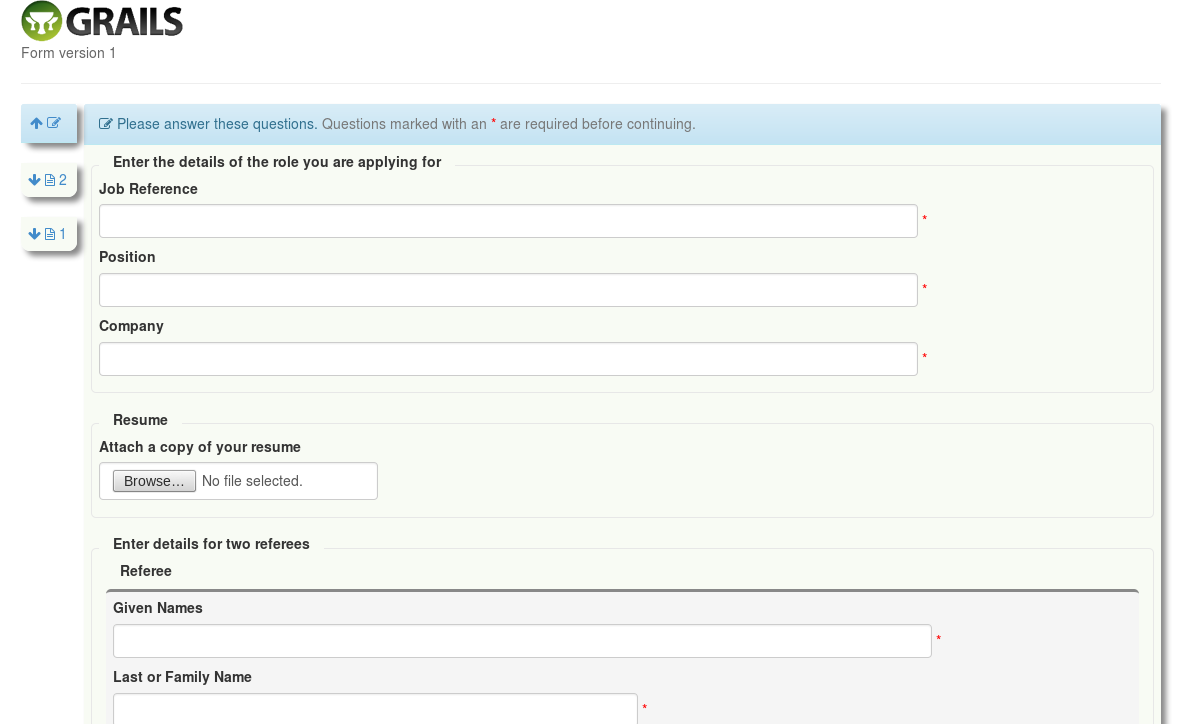
Fill in some more values and click next. You should see the third page of questions shown below.
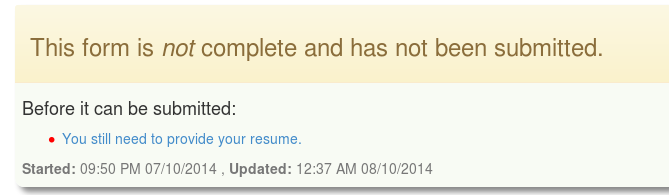
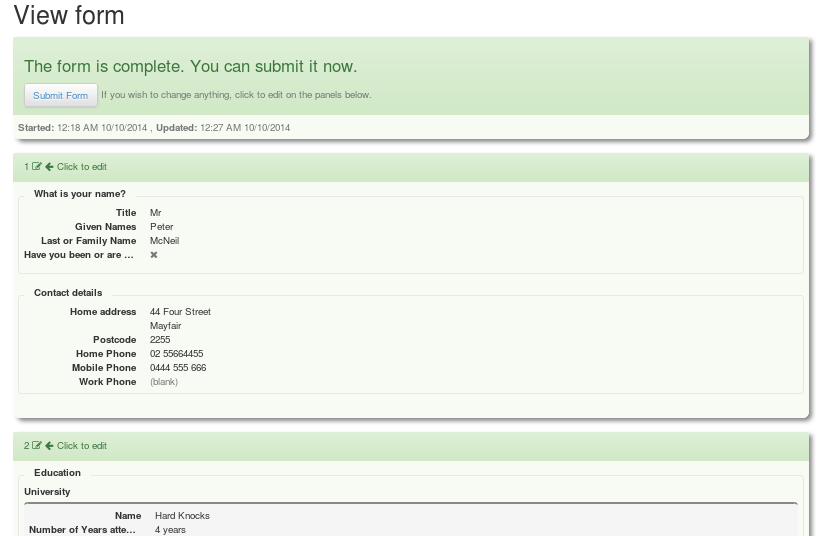
When you click Next this time you are taken to a summary page that shows what you have entered and that you need to attach a resume (assuming you didn’t attach anything).
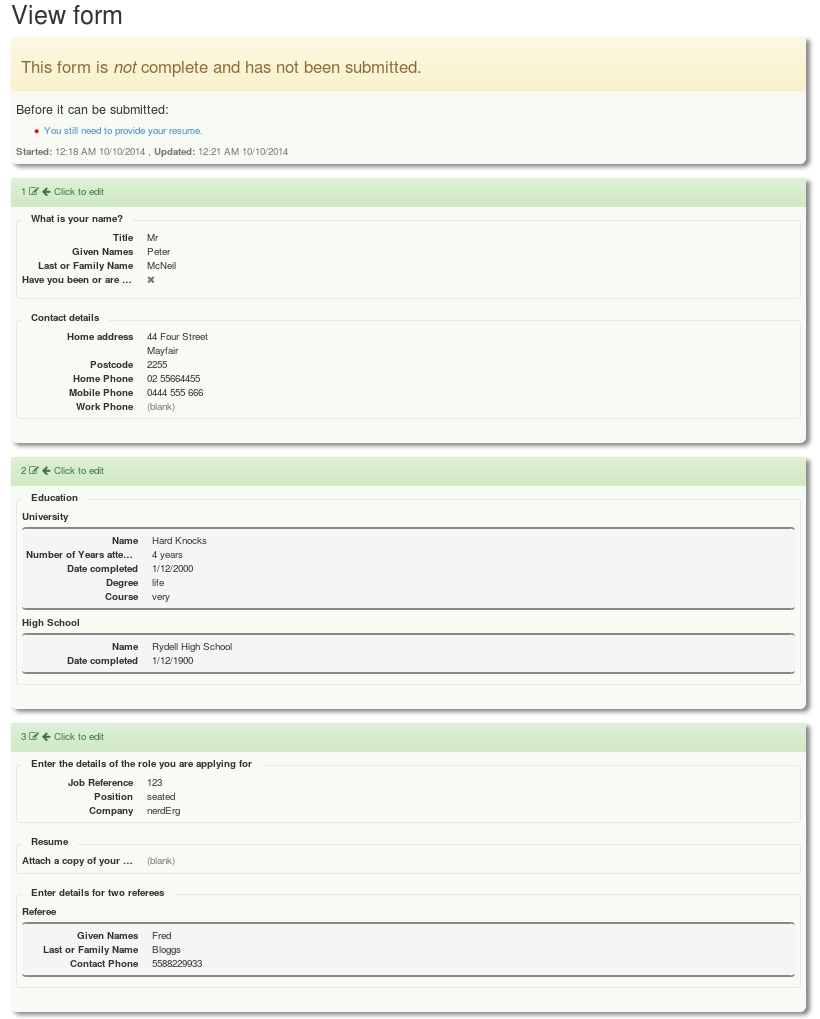
You can click any of the panels to go back and edit that page of questions. Good Form is clever enough to figure out if you need to be asked any subsequent questions when you change an answer. If you click the "You still need to provide your resume" you’ll be taken to the question you need to complete. Attach a file then click "Next" and you should get to the submit summary page.
You can now click the "Submit Form" button. You’ll be taken to a page that says the form has been submitted, but that this is a stub waiting for you to implement something.

10. Making suggestions work
You may remember that we installed the Simple Suggestions plugin back when we installed GoodForm. Simple Suggestions lets you suggest values based on what people type in. You can see how it works at http://nerderg.com/Simple+Suggestions+plugin .
GoodForm supports the Simple Suggestions plugin by setting a suggest attribute in the form definition. We’ve used the
suggest twice in the "name" question, in "Title" and in "Type of name".
 question("Name") {
     "What is your name?" group: "names", {
         "Title" text: 10, hint: "e.g. Mr, Mrs, Ms, Miss, Dr", suggest: "title", map: "Title"
         "Given Names" text: 50, required: true, map: "givenNames"
         "Last or Family Name" text: 50, required: true, map: "lastName"
         "Have you been or are you known by any other names?" hint: "e.g. maiden name, previous married name, alias, name at birth", map: "hasAlias", {
             "List your other names" listOf: "aliases", {
                 "Other name" text: 50, map: 'alias'
                 "Type of name" text: 40, hint: "e.g maiden name", suggest: "nameType", map: 'aliasType'
             }
         }
     }
 }
To make this work we need to provide a suggestion handler, we’ll use the default handler and just create a directory in the root of our project called "suggestions", and put two files in there called title.txt and nameType.txt.
title.txt should look like this:
Mr
Ms
Miss
Mrs
Master
Dr
Professor
Sir
and nameType.txt should look like this:
maiden name
previous married name
alias
name at birth
pseudonym
twitter name
Now if you go to the Name question in the form and type "M" a list of suggestions will appear for you to click on. If you tick "Have you been or are you known by any other names?" then type t in "Type of name" you should see the suggestion "twitter name".
That was simple, wasn’t it!?
You can provide handlers to look up a database or a REST service if you like too.
11. Handling the form data once submitted
As we saw when you clicked "Submit" when you had completed the form you got a message saying this is a stub. This is the point at which you get to do something with the data the user has entered. The data you get back is a document. It is currently stored in the database as a JSON string.
We need to hook into the submit action to get the data. To do this we override the submit action in the JobApplicationFormController.
Lets take the form data and just send it as JSON to the browser. Add the following submit action to your
JobApplicationFormController.
| It will help to have a browser that will display JSON. In both Firefox and Chrome try the JSONView add-on/extension. |
def submit(Long id) {
    FormInstance formInstance = formDataService.getFormInstance(id)
    Map data = formInstance.storedFormData()
    render(contentType: 'application/json') {
        data
    }
}
Now if you fill in the form and click submit you should see a nice page of JSON something like this:

As you can see the Form Data is a Map of the mapped questions in the form definition. So you can see if you follow the Definition structure you can find the data in the Form Data map. Take a look at the "Name" question again:
question("Name") { //'Name'
    "What is your name?" group: "names", { //'Name.names'
        "Title" text: 10, hint: "e.g. Mr, Mrs, Ms, Miss, Dr", suggest: "title", map: "Title"  //'Name.names.title'
        "Given Names" text: 50, required: true, map: "givenNames"  //'Name.names.givenNames'
        "Last or Family Name" text: 50, required: true, map: "lastName"  //'Name.names.lastName'
        "Have you been or are you known by any other names?" hint: "e.g. maiden name, previous married name, alias, name at birth",
            map: "hasAlias", {   //'Name.names.hasAlias'
            "List your other names" listOf: "aliases", { //'Name.names.hasAlias.aliases'
                "Other name" text: 50, map: 'alias' //'Name.names.hasAlias.aliases.alias[]'
                "Type of name" text: 40, hint: "e.g maiden name", suggest: "nameType", map: 'aliasType' //'Name.names.hasAlias.aliases.nameType[]'
            }
        }
    }
}
I have added comments which show the mapping to the Form Data map. You can check those against your JSON output.
You’ll notice in the form data that we store the form version and the FormInstance ID, so if the document is separated from the Good Form database you can always go back and get the original.
11.1. Making the form read only
You may have noticed that you can go back to the form and edit it by going back to the JobApplicationForm index page at http://localhost:8080/goodform-tutorial/jobApplicationForm. You might also notice that you can do that even if you have submitted the form. This is probably not what you want, so you need to modify the submit action above to make the form instance read only.
def submit(Long id) {
    FormInstance formInstance = formDataService.getFormInstance(id)
    if(!formInstance.readOnly) {
        formInstance.setReadOnly(true)
        formInstance.save(flush: true)
        Map data = formInstance.storedFormData()
        render(contentType: 'application/json') {
            data
        }
    } else {
        flash.message = "Form already submitted, can't do that again."
        redirect(action: 'view', id: id)
    }
}
Now if you select that form for editing after submission it will return you to the index page with a message "The form is read-only".
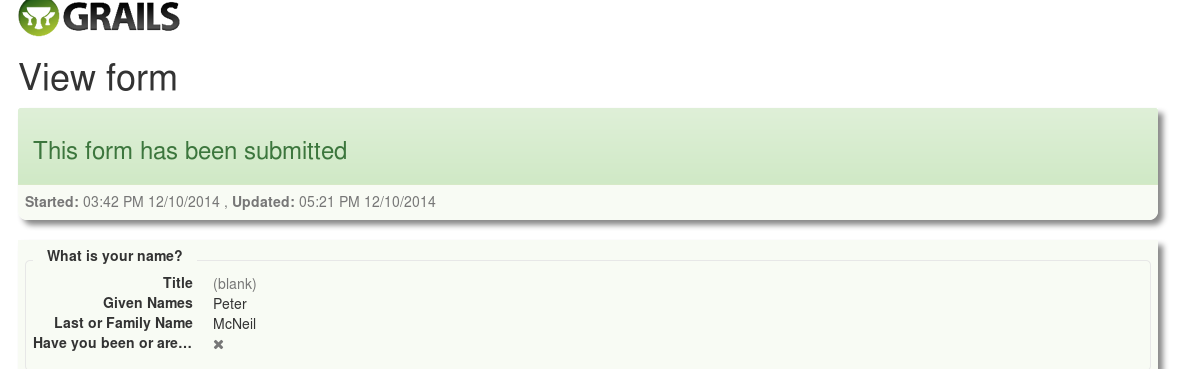
If you go to http://localhost:8080/goodform-tutorial/jobApplicationForm/view/1 you will see the text summary of the answers with "This form has been submitted" at the top.
If you try and submit the form again using http://localhost:8080/goodform-tutorial/jobApplicationForm/submit/1 you’ll get the message "Form already submitted, can’t do that again." and be redirected to the view page.
It is up to you how you handle this.
11.2. Getting the attachments
So you can get all the data from the Form Data map via the FormInstance, but where can you find the attachments that have been uploaded? For each form definition, e.g. "JobApplication" good form will create a directory in the application root with the same name, i.e. "JobApplication". In that directory will be directories for each form instance ID, and in that directory will be a file corresponding to the filename in the Form Data. So if the form data looks like:
"Resume": {
    "resume": {
        "resume": {
            "resume_file": "Resume.resume_file-PeterMcNeil_CV-2.odt"
        }
    }
},
then you’ll find the file at JobApplication/2/Resume.resume_file-PeterMcNeil_CV-2.odt.
| Good Form assumes you have protected this directory from access using something like Spring Security or Shiro. |
| You can modify the Good Form templates to allow users to download the files that they have already attached. You just need to provide a link to an action that checks authorization and sends the file back. |
12. That’s it.
That’s it for this tutorial, you’ve learned how to:
-
get started,
-
define a form,
-
define rules,
-
add suggestions and
-
handle submitted data